Interactive grass in Godot
Overview
This post will go through how we can make interactive grass without destroying the frame rate. The demo runs at around 200fps@1080p, with the following PC spec:
CPU: Ryzen 2600
GPU: GTX 960
RAM: 16 GB
Yes, I need an upgrade :P
Planting grass and swaying in the wind
Follow BotW style grass tutorial by lonegamedev. In this tutorial, you will:
- Generate custom mesh with triangles representing grass.
- Generate randomized continuous pattern that represent wind.
- Create shaders that will change vertex position according to the wind.
The result looks something like this:
I personally am not a fan of how winds are exaggerated in BotW. I tweaked the shader parameters to make it look more natural:
Unfortunately, the tutorial does not cover light shaders (it uses built-in default diffuse and specular shader). This is fine (as long as you use bulit-in toon diffuse), but we want to make grass wet partially and with fine control. I implemented a simple Blinn-Phong shader. It looks something like this:
diffuse = DIFFUSE_LIGHT + LIGHT_COLOR * ATTENUATION * ALBEDO;

vec3 h = normalize(VIEW + LIGHT);
float gloss = 3.5;
float ndoth = dot(NORMAL, h);
float intensity = pow(max(0.0, ndoth), gloss*gloss);
float specular_value = smoothstep(0.0, 1.0, intensity);
specular = (is_tip*0.95 + 0.05) * specular_value * LIGHT_COLOR * (0.01 + 0.035 * wetness);
Note that wetness variable is set elsewhere. This is covered later. Note that NORMAL has also been rotated around. This is also covered later.
Step-able grass
The aim is to bend the grass according to physical constraints - someone stepped on it or something is pushing it. With wind sway implemented from above, grass' pitch and yaw are set from a generated value. From here, I think there are two ways of extending the wind sway to make the grass 'step-able':
- Grass shader can keep track of objects that enter its area. Physical information should also be passed into the shader. This is similar to how simple lighting shaders are created from scratch.
- Grass shader has a texture channel that defines pitch/sway value. Wind sway can add on top of this.
The first solution has bad faults - passing in arrayed data is limited in optimization and extendability. Furthermore, we want the shader to focus on manipulating vertices and fragments, not figure out game logic.
The second solution allows us to do complex calculations outside shader code and simply pass in the results as a texture. We'll cover later why this is extremely advantageous.
Implementation - logic
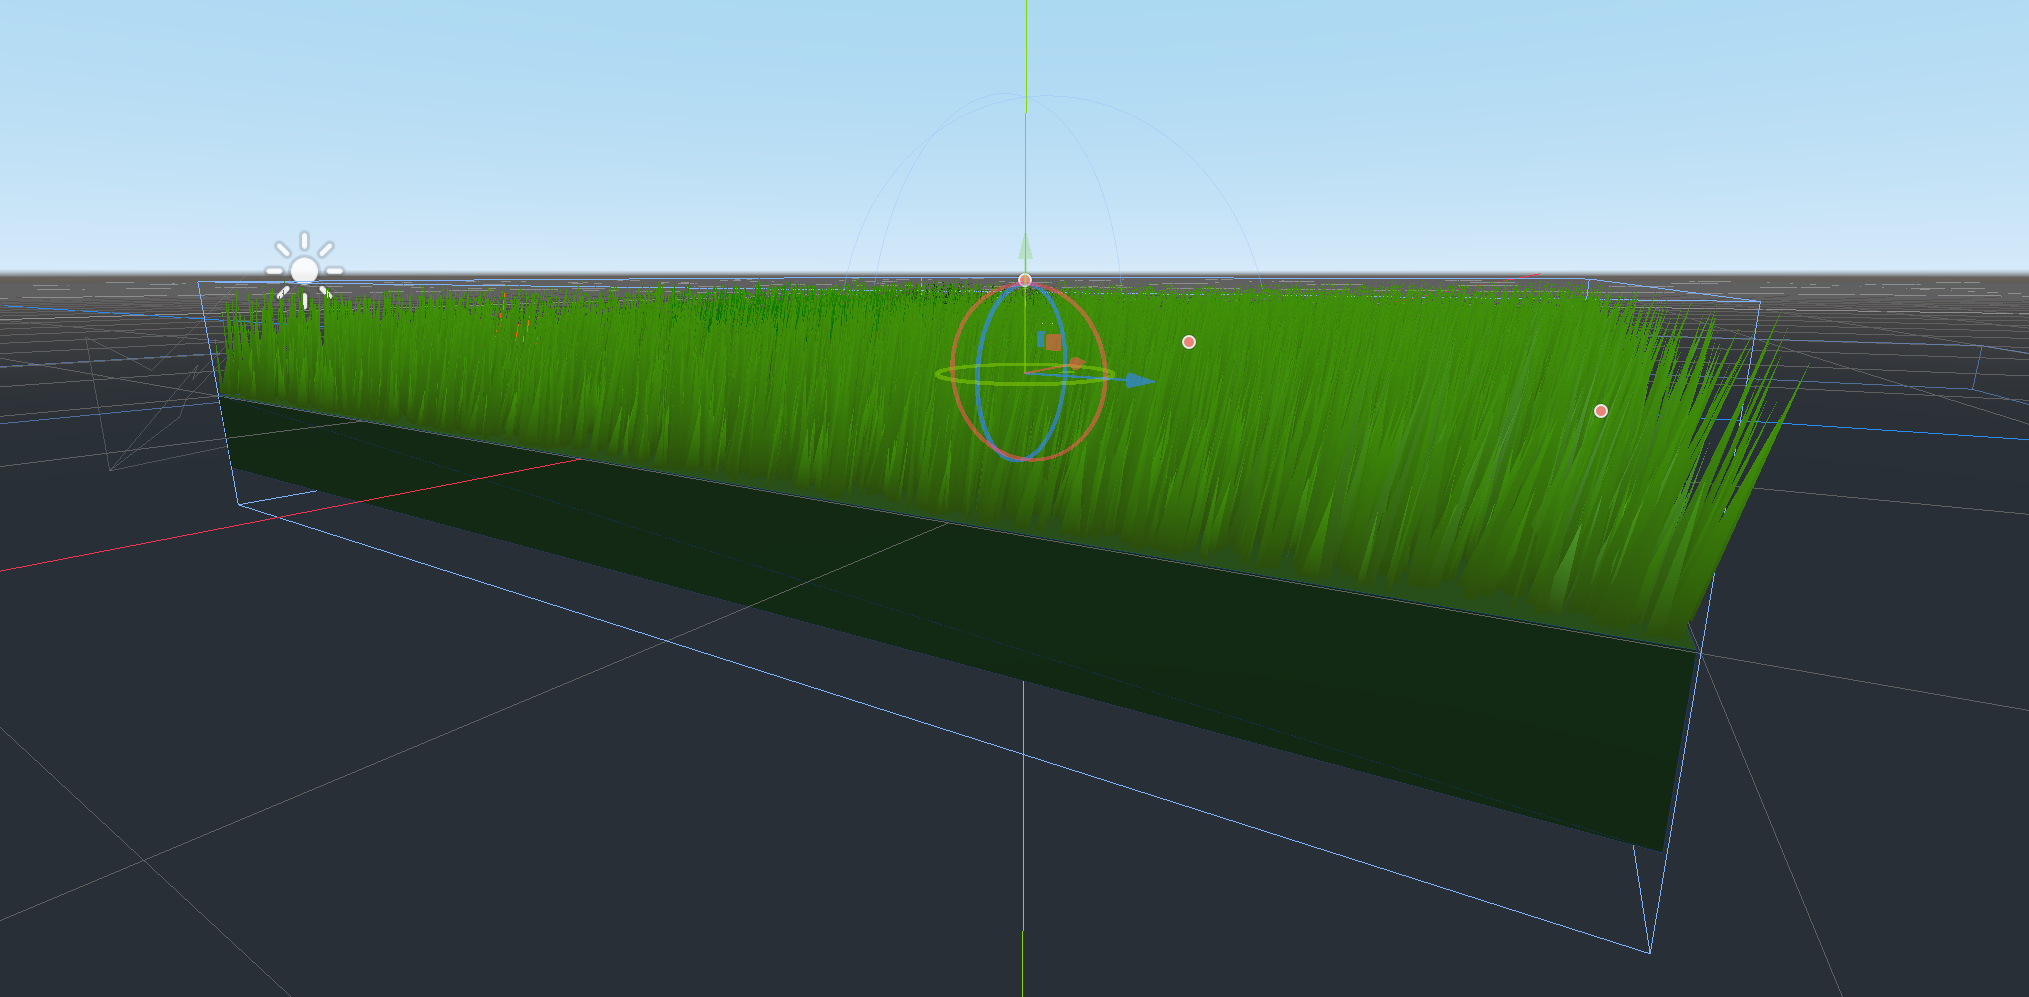
We are going to introduce a texture that wraps the entire grass area. We need to define UV coordinates for the vertices. Reminding ourselves that a single mesh instance is created for all the grass pieces in an area, we can map our UV coordinates as the following:
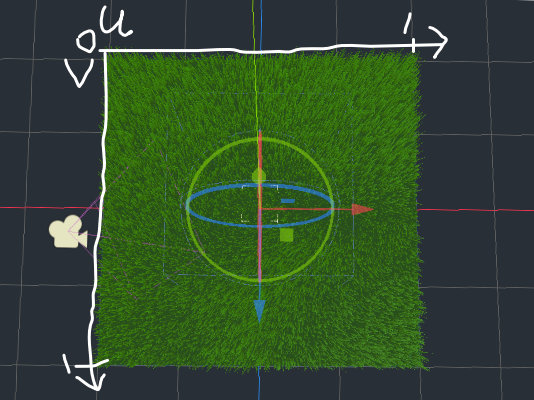
The position of the vertex within the area determines the UV coordinate. This means a pixel in the texture map will map to the specific area of grass.
One catch is that, if you followed the grass tutorial above, UV and UV2 channels are being used for something else. This is fine, we have color channel empty! Note that the grass colour is being derived elsewhere so we can use vertex colour channel. The planter script will contain something like this:
# Grass area extends over (-span, span) - ie. width/length is 2*span
rel_pos.x = (pos.x + span) / span / 2
rel_pos.z = (pos.z + span) / span / 2
multimesh.set_instance_color(index, Color(rel_pos.x, rel_pos.y, rel_pos.z))
Now that we can pass in 4-dimensional float data (rgba) to a group of grass, we can define a new texture channel as the following:
r: pitch amount
g: nothing
b: yaw amount
a: how much generated wind impacts
We can map float values like the following:
- Color 0.5 = 0 degrees sway/pitch. This means color 0.0 = -90 degrees, 1.0 = 90 degrees.
- Alpha 1.0 = full wind impact. Alpha 0.0 = no wind impact.
Here are some examples:
Color(0.5, 0, 0.5, 1.0) = normal. No sway, no pitch, generated wind fully impacts.
Color(0.0, 0, 0.5, 0.5) = Pitch by -90 degrees. Generated wind only impacts in half the strength.
Implementation - script
We first initialize dynamic texture:
func init_wind_texture():
  wind_img = Image.new()
  wind_img.create(wind_texture_size, wind_texture_size, false, Image.FORMAT_RGBA8)
  wind_img.fill(Color(0.5, 0.0, 0.5, 1.0))
  wind_img.lock()

  wind_img_texture = ImageTexture.new()
  wind_img_texture.create_from_image(wind_img, 0)

  multimesh.material_override.set_shader_param("wind_override", wind_img_texture)
We can now modify this texture to apply 'stepping'.
I think the most generic 'stepping' shape is a circle. In order to create a smooth sphere, we need to get gradient of the sphere at each point. I did this by simply 'stepping' to the direction instead of insane vector calculous:
func draw_wind_override_circle(pos_x, pos_y, rad, strength=1.0, noise=0.0, step_factor=0.01):
  for x in range(max(0, pos_x - rad), min(wind_texture_size, pos_x + rad)):
    for y in range(max(0, pos_y - rad), min(wind_texture_size, pos_y + rad)):
      # Relative distance from the center of the circle
      var dist = sqrt(pow(x - pos_x, 2) + pow(y - pos_y, 2)) / rad
      if dist < 1 - step_factor:
        # Reminder that 0.5 means no rotation
        var x_rot = 0.5
        var z_rot = 0.5

        var x_pos = (x - pos_x) / rad
        var y_pos = (y - pos_y) / rad

        var root_pos = Vector2(x_pos, y_pos)
        # Move towards the edge of the circle
        var step_vector = root_pos.normalized() * step_factor
        var step_pos = root_pos + step_vector

        # Find Z (ie. height) coordinates at root and step
        var root_z = 1 - sqrt(1 - root_pos.x*root_pos.x - root_pos.y*root_pos.y)
        var step_z = 1 - sqrt(1 - step_pos.x*step_pos.x - step_pos.y*step_pos.y)

        var gradient_vector = Vector3(step_pos.x, step_pos.y, step_z) - Vector3(root_pos.x, root_pos.y, root_z)

        # Gradient
        var a = sqrt(gradient_vector.x * gradient_vector.x + gradient_vector.y * gradient_vector.y)

        var a_rot_factor = 0.5
        var x_rot_factor = 0.5

        if gradient_vector.z != 0:
          a_rot_factor = atan(a / gradient_vector.z) / PI
          x_rot_factor = atan(gradient_vector.x / gradient_vector.z) / PI

        if y_pos > 0:
          z_rot = 0.5 + a_rot_factor * strength
        else:
          z_rot = 0.5 - a_rot_factor * strength
        x_rot = 0.5 + x_rot_factor * strength

        x_rot += rand_range(-noise, noise)
        z_rot += rand_range(-noise, noise)

        wind_img.set_pixel(x, y, Color(x_rot, 0.0, z_rot, dist))
Once we draw to wind_img, we need to explicitly re-apply the image to the texture if we want to render in-game:
wind_img_texture.create_from_image(wind_img, 0)
Implementation - shader
First, save the rotational matrix from generated wind:
mat3 rot_right = mat3_from_axis_angle(sway_pitch, wind_right);
mat3 rot_forward = mat3_from_axis_angle(sway_yaw, wind_forward);
rotation_factor = rot_right * rot_forward;
Derive angle from the color value of the texture and find out which axis quadrant the angle is in. Note that X and Z implementations are identical:
// Reminder that COLOR.rb is our relative position within the grass area - ie. UV value.
float wind_override_z = texture(wind_override, COLOR.rb).b;
float z_factor = 1.0;
float z_override = 0.0;
if (wind_override_z > 0.51 || wind_override_z < 0.49) {
  // override value
  z_override = PI * (wind_override_z - 0.5) - 0.1;
  if (wind_override_z < 0.5) {
    z_factor = -1.0;
  }
}
mat3 rot_z = mat3_from_axis_angle(z_override, to_model * normalize(wind_override_z_origin));
Then apply the rotational matrix:
// Depending on where we are in UV, the order of matrix multiplication changes. This depends on your script code later on.
if(x_factor * z_factor > 0.0) {
  rotation_factor = rot_z * rot_x * rotation_factor;
} else {
  rotation_factor = rot_x * rot_z * rotation_factor;
}
vertex = rotation_factor * vertex;
To ensure our light shaders work correctly, rotation_factor needs to rotate NORMAL:
float side = front_facing ? 1.0 : -1.0;
NORMAL = rotation_factor * NORMAL * side;
Result
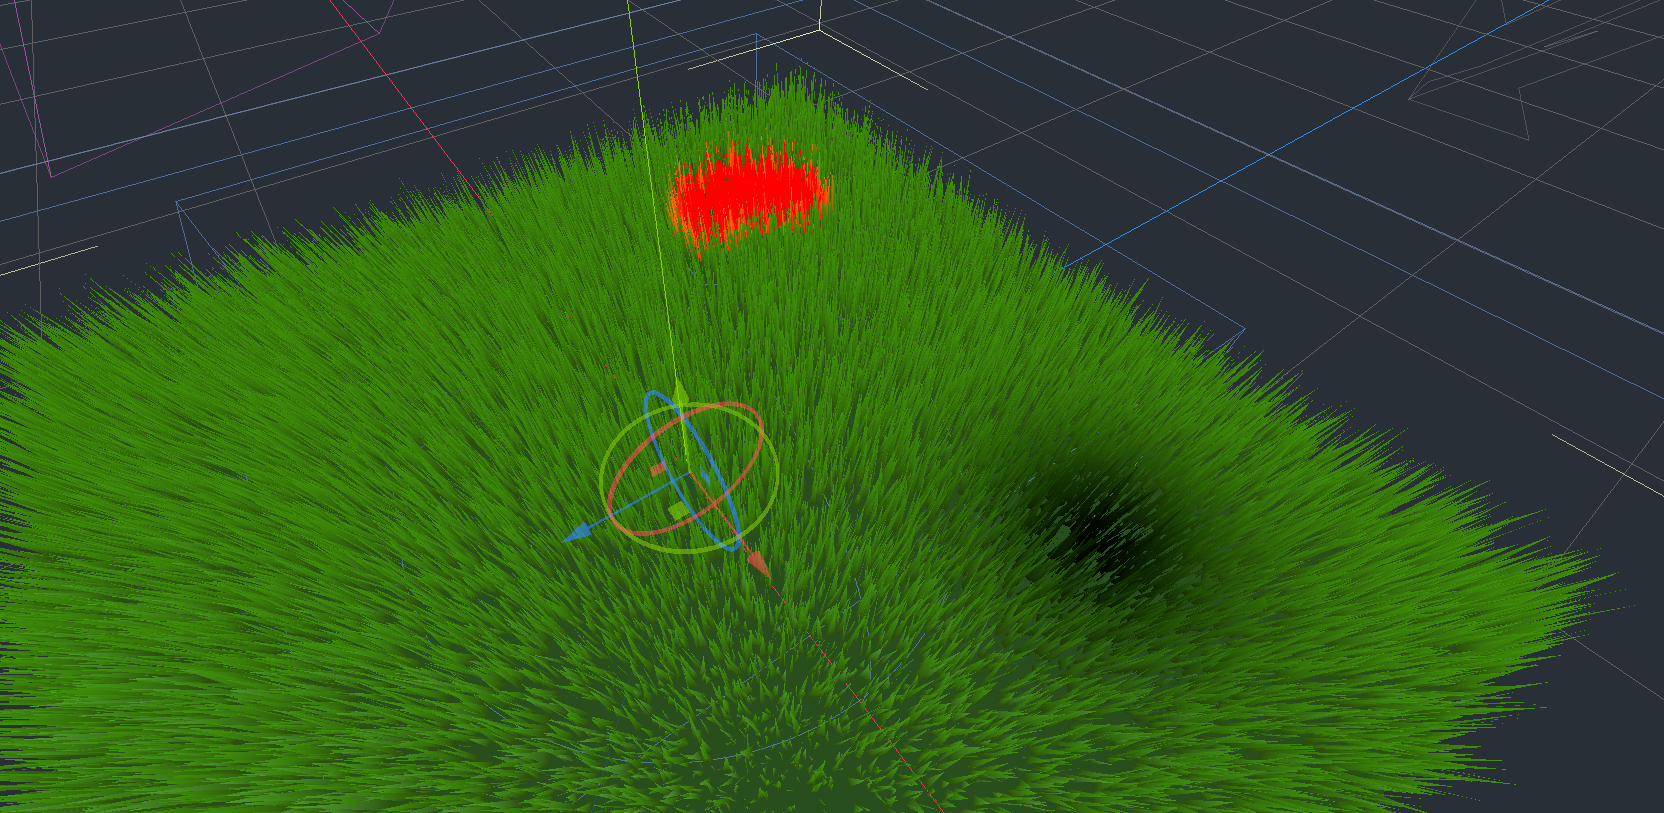
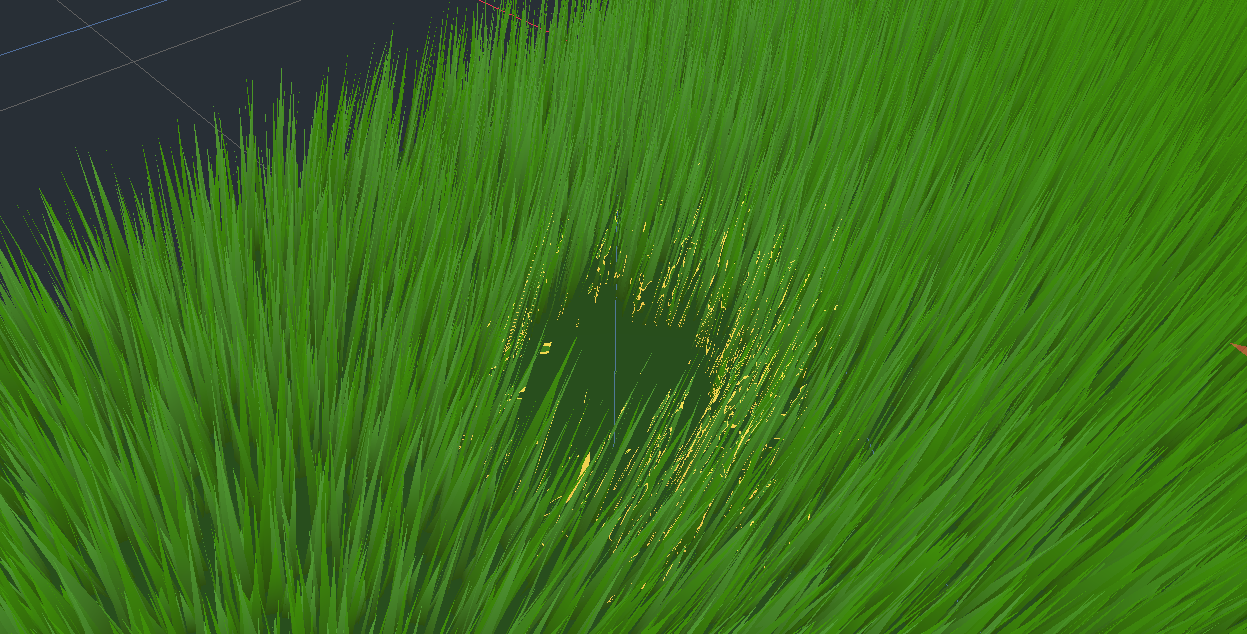
The result of drawing a circle (sphere) looks like this:
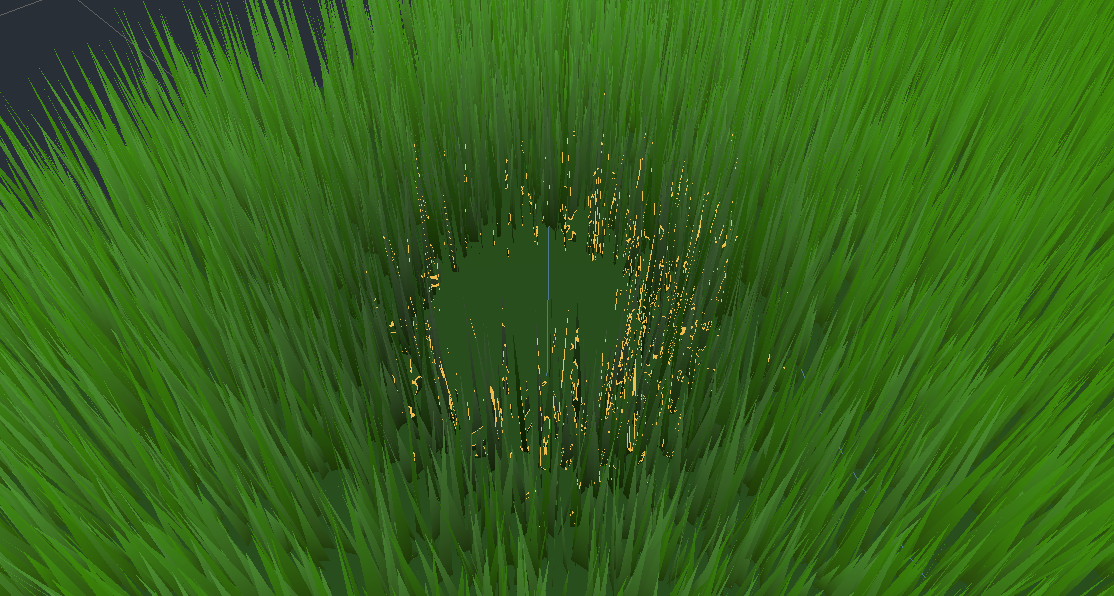
Notice that we have noise argument in the function. This allows us to randomly add noise to the circle. For example:

This is a handy effect for various scenarios. For example, Goku might go Super Saiyan in the grass. We want the grass to shake and sway as Goku charges Chi.
Detecting physical objects on the grass
To detect physical objects, I created collision Area as a child of grass mesh, covering the entire grass area:
In this Area, an object is tracked upon entering Area. Then, the parent grass reads the tracked objects. determined which draw_wind_override function to use at what size, then manipulate wind texture.
Note that, for optimization, I made tracking of physical objects strictly 30 fps (ie. on a Timer instead of _delta). This allows smooth-enough reaction from the grass without killing the framerate. This is perfectly fine, since grass moving is just an aesthetic component of the game.
Advantages
Texture mapping method (over doing this purely on shader) has great performance advantages:
- We have full control over how granular our detail is. If we had done the first solution, we would have to manipulate all impacted grass vertices, one by one (ie. complexity grows with the number of grass pieces). Texture map instead groups vertices together, reducing number of calculations (ie. complexity stays the same with the number of grass pieces).
- We don't have to update sway/pitch information every frame.
Preparing to make grass for cut, wet and burn
We are going to utilize similar texture-to-area mapping that was used above. We will introduce two new texture channels:
- Color override. This texture will change the color of the grass.
- Cut-wet-burn metadata. This texture will define how much the grass is cut, wet or burnt.
Cut-able grass
The aim is to make grass cut-able when someone swings a sword. Since vertex manipulation is expensive, we will simulate this by simply making the grass shorter.
Let r of cut-wet-burn metadata texture as how short the grass is. r=0.0 is full length, r=1.0 is no length. Shader can read this value and alter the vertex position:
// Reminder that COLOR is the grass' relative position within the area
vertex.y *= INSTANCE_CUSTOM.y * (1.0 - texture(cut_wet_burn_metadata, COLOR.rb).r);
I think you can come up with good script logic if you have gone through wind texture logic. Manipulate the metadata texture according to your needs :)
With this, we can draw up interesting patterns (like crop circles!). I think they are pretty boring, so I simulated grass growing:
Wet-able grass
The aim is to allow grass to get wet, so that we can simulate rain or water-based skill effects. We will make the grass darker and shinier to simulate wetness.
Let g of cut-wet-burn metadata texture as how wet the grass is. g=0.0 is be dry, g=1.0 is fully wet. As you may have guessed at this point, shader can read this value and alter the 'wetness'.
We can read the 'wetness' like the following:
// Reminder that COLOR is the grass' relative position within the area
wetness = texture(cut_wet_burn_metadata, COLOR.rb).g;
Based on wetness, make the vertex color darker:
color -= wetness / 90.0;
Remember light shader code from above? That takes in wetness variable as specular light input. That controls the shininess of the grass.
Again, just like cutting the grass, I think script logic is simple and I don't think you will have trouble coming up with one by yourself for your needs. I am going to skip it here too.
The result looks something like this:
Note that this wetness is going to impact grass burning later :)
Color-able grass
The aim is to allow grass to get painted according to game situations - someone may have spilled blood on it. May be paint got thrown on it. Burning also makes the grass go charcoal.
This is straight-forward, we are using texture channel traditionally. Simply mix the colors with the values read from the color texture:
vec4 override_color = texture(color_override, COLOR.rb);
color = mix(mix(color_bottom.rgb, color_top.rgb, UV2.y).rgb, override_color.rgb, override_color.a);
With this, we can color the grass:
Burn-able grass
The aim is to burn grass and make burning spread, gradually reducing the burning amount. We want all in-game fire to impact the grass. As you may have guessed, this involves shaders and scripts.
Implementation - shader
Let g of cut-wet-burn metadata texture as how burnt the grass is. g=0.0 is not burnt, g=1.0 is completely burnt.
First, we need a fragment shader to make grass burn. Follow GDQuest's dissolve shader tutorial. When implementing, read the g of cut-wet-burn metadata texture to apply how much grass should 'dissolve'.
The result will look like the following:
This is not really convincing enough. So, combine with coloring the grass black around the burned area:
Looks a bit more convincing, we'll tweak it in the script to make it look better.
Implementation - script
Script will make the grass burn and spread the fire. To achieve this, we need to keep track of where the fire started and update shader according to fire's progress. This involves two parts, starting fire and processing fire.
Starting fire is simply adding a dictionary to a list:
func start_fire(x, y, max_radius, rate=1.0/30.0, burn_amount=0.02):
  if x > 0 and x < metadata_texture_size and y > 0 and y < metadata_texture_size:
    fire_info.append({
      'position': Vector2(x, y),    # texture position
      'max_radius': max_radius,     # maximum fire spread
      'rate': rate,                 # how fast fire spreads
      'burn_amount': burn_amount,   # how strong the fire is
      'last_updated': rate,         # tracking last update time
      'visited': {                  # simple visited dictionary
        Vector2(x, y): true,
      },
      'to_visit': [Vector2(x, y)],  # next nodes (pixels) to update
    })
The dictionary stores where the fire started and associated fire metadata.
Detecting fire simply reuses physical object detection for step-able grass. Area keeps track of fire that entered the area, grass reads that data and starts fire. Just like step-able grass, detect fire at a fixed framerate to save resources.
Spreading fire happens per-fire-started (ie. per dictionary in the list), visiting texture pixels in BFS. Note that this process reads 'wetness' of the grass and controls the fire spreading.
func process_fire(delta):
  var updated = false
  for fire_data in fire_info:
    fire_data['last_updated'] += delta
    if fire_data['last_updated'] >= fire_data['rate']:
      updated = true
      fire_data['last_updated'] = 0
      var next_to_visit = []

      # To visit pixels = currently burning
      for position in fire_data['to_visit']:
        # Relative distance from starting point
        var dist = (position - fire_data['position']).length()
        # Based on relative distance, determine maximum burn amount
        var dist_ratio = clamp(
          1.8 * (fire_data['max_radius'] - dist) / fire_data['max_radius'], 0.1, 1.0)

        var existing_data = metadata_img.get_pixel(position.x, position.y)
        # New burn amount
        var new_burn = clamp(existing_data.b + fire_data['burn_amount'], 0, 1)

        # If the grass is wet, reduce the wetness
        if existing_data.g > 0:
          # Reduce wetness by fire's max burn strength (ie. dist_ratio)
          var new_wetness = clamp(existing_data.g - dist_ratio, 0, 1)
          metadata_img.set_pixel(position.x, position.y, Color(existing_data.r, new_wetness, existing_data.b, existing_data.a))

        # If the grass wetness is below threshold, burn and spread!
        if existing_data.g < new_burn * 25:
          metadata_img.set_pixel(position.x, position.y, Color(existing_data.r, existing_data.g, new_burn, existing_data.a))
          # Charr the grass
          color_img.set_pixel(position.x, position.y, Color(0, 0, 0, clamp(new_burn * 2.5, 0, 1)))

          # New burn value is considered not finished burning
          if new_burn > 0.05:
            # since we finished burning, find where we can spread to
            for next_position in [
              Vector2(position.x + 1, position.y),
              Vector2(position.x, position.y + 1),
              Vector2(position.x - 1, position.y),
              Vector2(position.x, position.y - 1),
            ]:
              if next_position.x < 0 or next_position.x >= metadata_texture_size:
                continue
              if next_position.y < 0 or next_position.y >= metadata_texture_size:
                continue

              var position_delta = fire_data['position'] - next_position
              if position_delta.length() < fire_data['max_radius'] and not fire_data['visited'].has(next_position):
                fire_data['visited'][next_position] = true
                next_to_visit.append(next_position)

            # see if this has reached max burning potential
            # Still can burn
            if new_burn < dist_ratio:
              next_to_visit.append(position)
            # completed burning
            elif new_burn > 0.95:
              # set cut - so that no invisible masks
              metadata_img.set_pixel(position.x, position.y, Color(1.0, existing_data.g, new_burn, existing_data.a))
          # We still need to burn this pixel.
          else:
            next_to_visit.append(position)

      if len(next_to_visit) > 0:
        fire_data['to_visit'] = next_to_visit
      else:
        fire_info.erase(fire_data)
  return updated
Note that the spreading logic is limited here and only spreads in the shape of a diamond. If we pre-calculate and store distance (from the start point) dict for all impacted pixels, we can easily make the fire spread in circular fashion. I'll leave it to you to implement.
Result
The combination of shader and script results in the following:
When there is a wet area, fire evaporates water (ie. reduce wetness) instead:

Additional particle effects (for fire and bits of smoke) would make this effect more believable :) Good luck!
Wrapping up
Key takeaways:
- Use texture map to pass in dynamic, game-logic-derived data to shaders. Don't be shy to pass in non-color values.
- Focus shaders on only rendering things.
- Don't necessarily update things per frame. Compromise for performance without degrading gameplay experience.